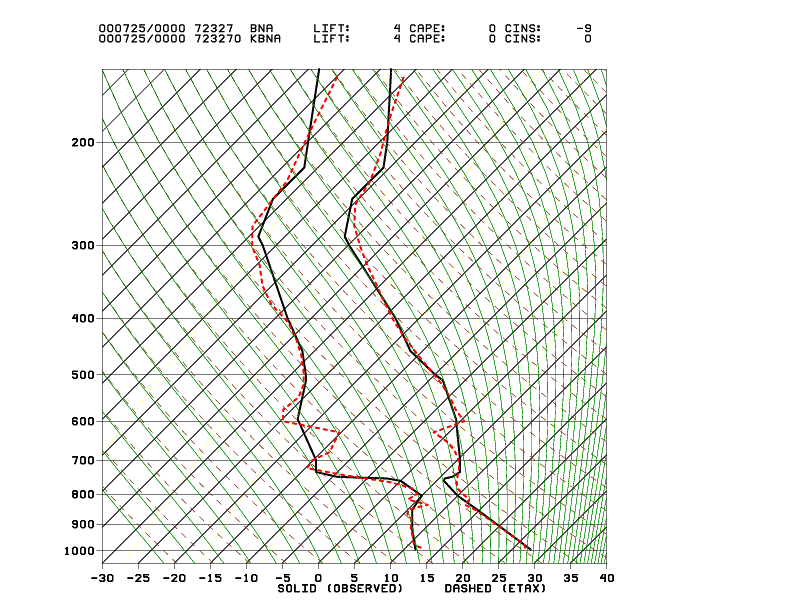
Figure 10: Same as Figure 9, but for the Eta-22.